Create a simple Calculator using Node.js and EJS
- Sabeena Viklar
- Aug 2, 2023
- 5 min read

In this blog, you will learn how to create a simple calculator using Node.js and EJS. Additionally, you will gain insights into creating routes in Node.js and effectively utilizing EJS templates.
So, the first step is to begin by creating a folder where you want to establish your project.
And run this command in your terminal.
Node dependencies
npm init -yThis command will basically creates a package.json file for you . The package.json file is a crucial part of any Node.js project. It contains metadata about the project, such as the project's name, version, description, entry point, dependencies, and more.
Then run this command. This command will install the express dependency which is required to make routes.
npm i expressNow, install ejs. EJS(Embedded JavaScript)allows you to generate dynamic HTML pages by embedding JavaScript code directly into the HTML markup.
npm i ejsNow install body-parser. The body-parser middleware helps the server to read and understand that data so that it can be processed and used in your web application.
npm i body-parserNow install path. It will help you to require files in the public , views folder, etc.
npm i path. Folder Structure
Now, we are done with all node dependencies. Now, we can start creating the files in for the project. Create the app.js file in the main folder.Create views folder for the ejs files. Create public folder for CSS. Create EJS file in the views folder.
The folder structure should be like the below
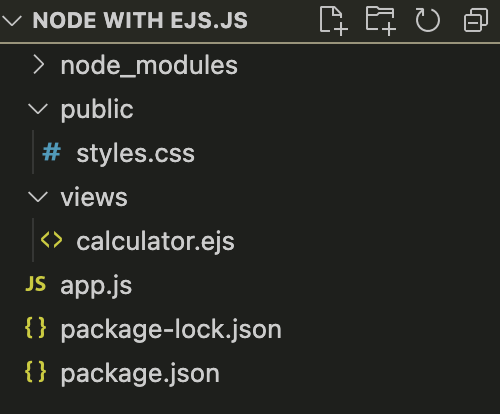
Note: Feel free to adjust file and folder names as needed.
Let's start with the Code
Now, without any ado, Let's start with the Code.
Let's require all the dependencies we installed in the '
Require all the dependencies in the app.js file.
const express = require('express');
const app = express();
const path = require('path');

const bodyParser = require('body-parser');
Now let's set everything , So, that we can Use!!
app.set('view engine', 'ejs');This line sets the view engine for your Express application to EJS (Embedded JavaScript). It means that when you render any views in your application, Express will automatically look for EJS files and use them as the templates to generate dynamic HTML content.
app.set('views', path.join(__dirname, 'views'));This line sets the directory where your EJS templates are located. By default, Express will look for views in a folder named "views" in the root of your project. However, in this line, you explicitly set the "views" directory to be in the same directory as your script (__dirname), and then inside the "views" folder. This way, you can organize your views in a separate folder.
app.use(express.static(path.join(__dirname, 'public')));This line serves static files from the "public" directory. The express.static middleware is used to handle the serving of static assets in Express. By adding this line, you are telling Express the location of any files located in the "public" .
app.use(bodyParser.urlencoded({ extended: true }));This line uses the body-parser middleware to parse request bodies. Specifically, it is configuring body-parser to handle URL-encoded form data submitted in POST requests.
Let's Start creating the Routes. First we will create route for get request.
app.get('/', (req, res) => {
  res.render('calculator', { result: null });
});
res.render is basically rendering the file we created. Calculator is the name of the file name in the views folder.
Let's create another route for post request.
app.post('/calculate', (req, res) => {
  const { num1, num2, operator } = req.body;
  let result;

  switch (operator) {
    case '+':
      result = parseFloat(num1) + parseFloat(num2);
      break;
    case '-':
      result = parseFloat(num1) - parseFloat(num2);
      break;
    case '*':
      result = parseFloat(num1) * parseFloat(num2);
      break;
    case '/':
      result = parseFloat(num1) / parseFloat(num2);
      break;
    default:
      result = 'Invalid operator';
  }

  res.render('calculator', { result });
});
Let's breakdown the code and understand it!!
app.post('/calculate', (req, res) => { ... });This line sets up a POST route in your Express application. The route path is '/calculate', which means it will handle POST requests sent to the '/calculate' endpoint.
const { num1, num2, operator } = req.body;In this line, the code uses destructuring assignment to extract the properties num1, num2, and operator from the req.body object. req.body contains the data submitted in the POST request's body, which, in this case, would be form data from a calculator form.
let result;This line declares a variable named result, which will be used to store the data result of the calculation.
switch (operator) { ... }This is a switch statement that checks the value of the operator variable to determine which arithmetic operation should be performed. The operator variable contains the operator entered in the calculator form, such as '+', '-', '*', or '/'. The switch statement checks the value of operator and performs the corresponding operation according to the cases.
result = parseFloat(num1) + parseFloat(num2);, result = parseFloat(num1) - parseFloat(num2);, etc.In each case block, the code performs the corresponding arithmetic operation by converting num1 and num2 from strings (since form data is always sent as strings) to floating-point numbers using parseFloat() and then applies the appropriate operator. The result of the calculation is stored in the result variable.
default: result = 'Invalid operator';The default case in the switch statement handles the situation when an unsupported operator is entered in the form. If the operator is not one of the supported cases ('+', '-', '*', or '/'), the code consider such cases as invalid operator.
res.render('calculator', { result });Finally, after calculating the result, the code renders the 'calculator' view using res.render(). It passes the result variable as a data object to the view. The 'calculator' view will then use this data to display the result on the web page. So, Basically it performs the calculation.
To start the node server, you can use this code.
app.listen(3000, () => {
  console.log('Server is running on the port 3000');
});
You can change the console message accordingly.
At the first , you will not see anything on the Site , Since we have not added the EJS template.
Let's start building up the EJS!!
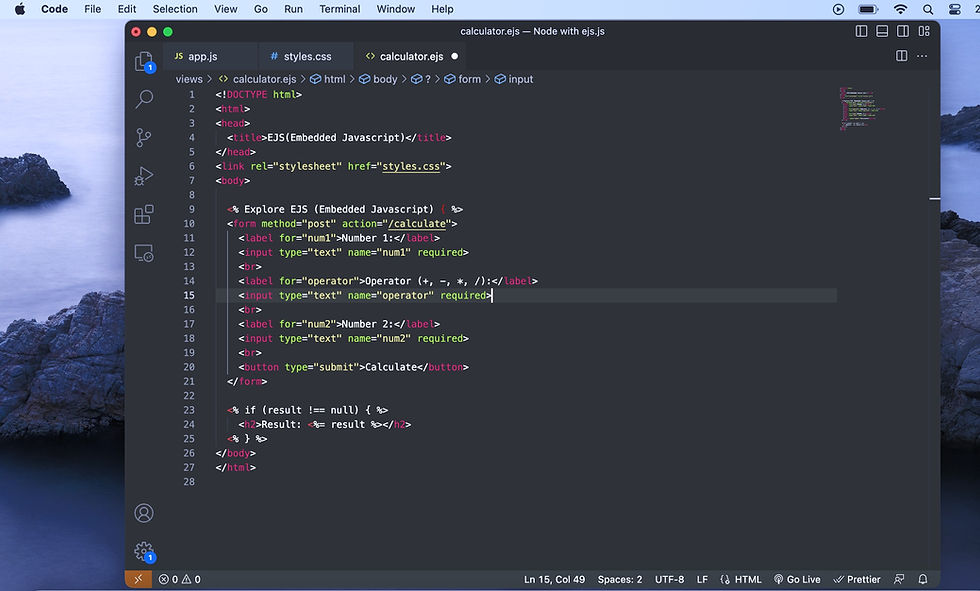
Write the ejs code in the calculator.ejs file
<!DOCTYPE html>
<html>
<head>
  <title>Simple Calculator</title>
</head>
<link rel="stylesheet" href="styles.css">
<body>
  <h1>Simple Calculator</h1>
  <form method="post" action="/calculate">
    <label for="num1">Number 1:</label>
    <input type="text" name="num1" required>
    <br>
    <label for="operator">Operator (+, -, *, /):</label>
    <input type="text" name="operator" required>
    <br>
    <label for="num2">Number 2:</label>
    <input type="text" name="num2" required>
    <br>
    <button type="submit">Calculate</button>
  </form>

  <% if (result !== null) { %>
    <h2>Result: <%= result %></h2>
  <% } %>
</body>
</html>
This is similar to the HTML template. So, let's understand only this
<% if (result !== null) { %> This is an EJS (Embedded JavaScript) code block that checks if the "result" variable is not equal to null. If there is a "result" value, it means that the form has been submitted and a calculation has been performed.
<h2>Result: <%= result %></h2>This line displays the result of the calculation. The result is inserted into the HTML using <%= result %>, which is a placeholder for the value of the "result" variable in the EJS template.
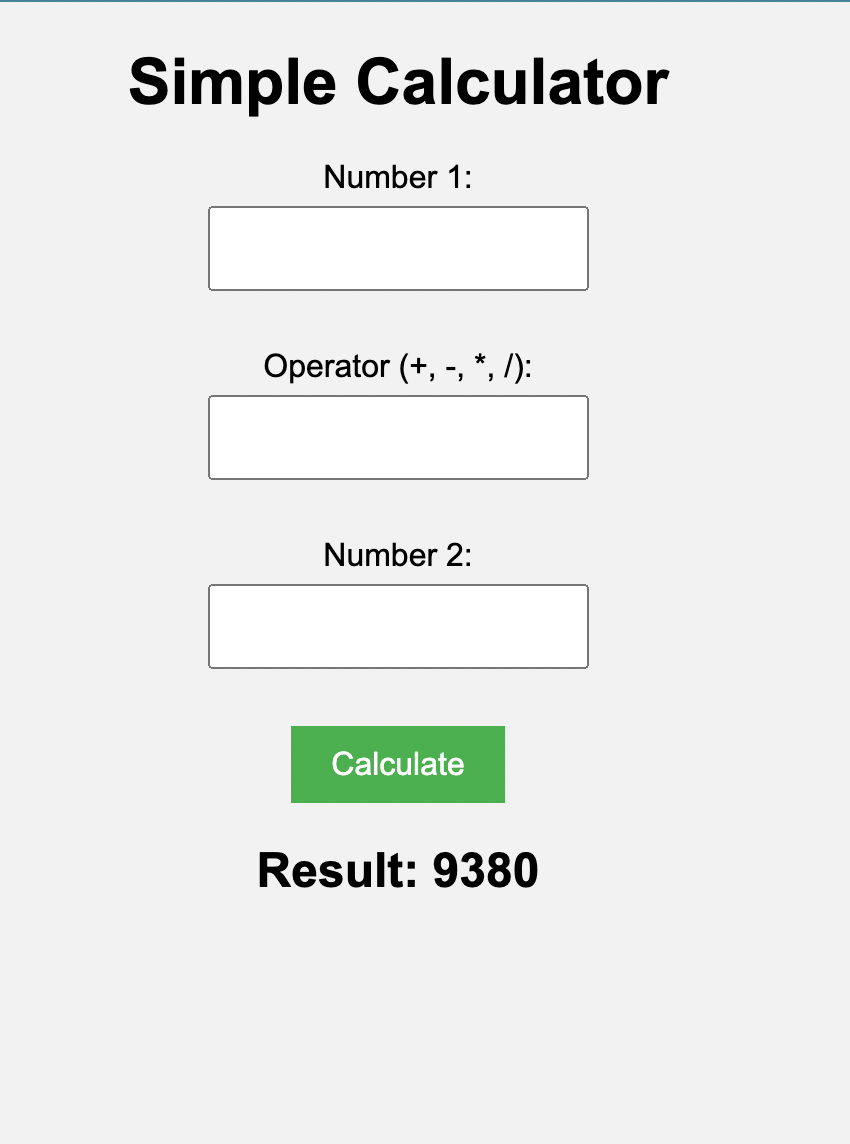
Now, if you refresh the node server, you will the calculator , and it will perform calculation.
Let's apply some CSS styles to the Calculator by updating the styles file!
body {
    font-family: Arial, sans-serif;
    text-align: center;
    background-color: #f2f2f2;
  }

  h1 {
    margin-bottom: 20px;
  }

  form {
    display: flex;
    flex-direction: column;
    align-items: center;
    margin-bottom: 20px;
  }

  label {
    margin-bottom: 5px;
  }

  input[type="text"],
  select {
    font-size: 16px;
    padding: 10px;
    margin-bottom: 10px;
  }

  button {
    font-size: 16px;
    padding: 10px 20px;
    background-color: #4caf50;
    color: #fff;
    border: none;
    cursor: pointer;
  }

  h2 {
    margin-top: 20px;
  }
In the end, you will find an amazing Calculator on the Node server.
Thank you for taking the time to read this blog! If you have any questions or comments, please feel free to leave them below.
Comments